Tag Archives: diy

Homemade Perfumed Vanilla Oil

4 Apr

IMG_6398-001

After years of trying to track down my favourite vanilla oil from the Body Shop I was told that it is officially not available for purchase anymore.  I wore that perfume since my early 20s and absolutely loved it (especially since it’s one of the only fragrances that I could wear without the  constant sneezing, watery eyes and headaches).  And I used to get so many compliments as well!  The scent was really a perfect mix between sweet with a hint of spice and was mild enough not to be too overbearing.  Besides the odd comment about smelling like a batch of freshly baked chocolate chip cookies I really loved everything about that oil.

So after seeing it on ebay for $150 a bottle I finally decided that I needed to try my hand at perfume making.  And in the end I have to admit that it’s quite simple.  All you really need is lots of patience to get you through the 4-6 weeks of waiting until it’s finished.  Patience is definitely not my strong point so I actually found that the most difficult part.

The finished product has  a really lovely deep vanilla scent that actually lasts for quite a long time.  I use it as a body perfume, room freshener and bath oil.  I’ve even been know to put a bit on our beloved cat Birdie because, well, he stinks.

Everything you need to make this simple Vanilla Perfume Oil is shown in the photo above: vanilla beans, vodka and jojoba oil.  

Read on for full instructions on how to make your own… Continue reading

Surprise Message Bunting Cards

4 Feb

The other day I was chatting with one of my twin daughters about Valentine’s Day and all the fun we’ve had in the past making up special treats and cards for their classmates over the years. Over here in Italy (and I think generally in Europe) Valentine’s Day is a day reserved for couples and adults and not something kids celebrate like in North America.  So even though my kids have always been one of the few that celebrate it in school it has still become a lovely yearly tradition to make something together for their friends.
IMG_4054

This year we decided to make simple cards with sewn paper buntings that have little hidden messages.  Easy, quick and fun for kids of just about any age.IMG_4048-001

This is all you need to make these sweet little cards.  I used glassine for the actual bunting paper so that you can see the pretty patterned paper through it.  If you don’t have glassine paper any type of paper would be fine.
IMG_4051-002

I cut the glassine paper in long strips and folded it in half to have a square piece of paper.  I then sewed the pieces of glassine squares together with the sewing machine (making sure the folded edge is on the bottom).  This way the glassine paper is sewn on the top, closed by the fold on the bottom and open on the two sides (to make it easier to slip in the small pieces of paper with message on the back).IMG_4068After sewing the bunting together we slipped in little square pieces of paper with our special messages on the back.  Seeing as the glassine is open on both sides the messages are easy to slip in and out.  We then simply attached the sewn paper bunting to our cards with tiny heart stickers (pieces of washi would also be nice).

Now to come up with all the short little messages to go inside.  Some of my favourites that my kids have suggested for their classmates are: ‘you have nice handwriting’, ‘you are pretty smart’, ‘you have the best snacks’ and ‘you don’t smell’.  Let’s hope their romantic sides develop a little more in the years to come.

Snail Mail Booklet Letters

6 Sep

IMG_0824

It’s Friday and we all survived the first hectic week back to school.  The kids returned home from their first days at secondary school actually relieved.  Which means Mama was relieved.  They love the new schedules and running back and forth between classes and the fact that they are being treated more and more grown up.  It seems as though they’re ready for all this so I guess I have to be too.  Wish me luck.

As you may know my kids and I are big fans of snail-mailing our friends and family from around the world.  Snail-mailing is something that I have been doing for years (you should see my Japanese stationary collection that I started in my teens!) and my kids have definitely adopted my love for writing letters the old fashioned way.

For us it’s also an ideal way for my kids who are schooled in Dutch and French to practice writing English in an interesting and engaging way.  You should see those early letters that they wrote to their grandmother!  Sweet and almost impossible to understand.  Luckily they’ve come a long way since then in the spelling department.

A few months ago we participated in Giova‘s Flat Project with some little handmade fabric embellished cards.  We all loved this project so much that we’ve been busy thinking of new ways to make our own letters and cards for our penpals.  Here’s our latest idea.

IMG_0828

Materials Needed:

Patterned and solid coloured thin cardboard (or even heavy paper)
Scissors
Small hole punch
Brads
shapes for tracing (cookie cutters, bowls, boxes, wooden shapes etc)IMG_0809

One day my daughter and I were rummaging through one of my (beloved) drawers full of crafty goodness and we came across a little box full of brads that I had received from my mother years ago.  We took them out and admired all the little coloured metal and cloth embellished brads and decided we needed to use them immediatly (I love it that my daughter enjoys these things as much as I do).
IMG_0817

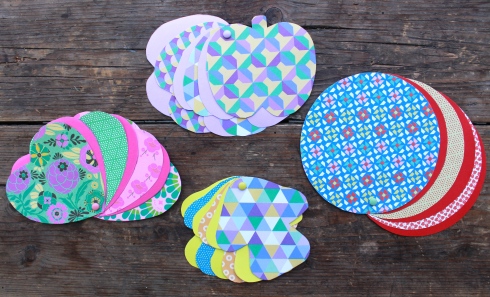
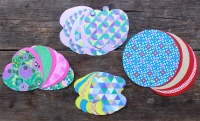
So seeing as we had a long list of penpals to write we decided to make little books in various shapes using our favourite patterned and solid coloured papers.  We searched the house for any possible object that we could trace  for interesting shapes (cookie cutters worked the best) and my daughter  hand drew a few shapes that she had in mind as well (unfortunately we don’t have a hot air balloon cookie cutter!).

IMG_0823We made books with anywhere from 3 pages to 8 pages and either alternated with solid and patterned paper or just did a patterned cover with all solid pages.

This is a great and simple paper project to do with kids of just about any age and ability.  My kids (who are 11,11,9 years old) are experimenting with more and more complicated shapes now as well  (airplanes, windmills, various pieces of clothing and maybe even a James Bond gun).

One daughter decided to start a back-and-forth letter with one of her pen-pals using one of the books.  She wrote her letter on the first page and her pen-pal will respond on the second and send it back.  She has dreams of this little book going back and forth over the ocean for years to come.  That’s my kind of dream!

IMG_0836

Happy Week-End!

Summertime Surprise Activity Garland

17 Jul

IMG_0067After a lot of motivation from my three enthusiastic kids I finally finished sewing up their summertime surprise activity garland yesterday.  They are so excited to do this again this year.  I changed up a few activities from last year and kept a few that were big hits (with a slightly different twist to keep it interesting).  This garland is perfect for those moments that the kids are just too tired/hot/bored to come up with something on their own.  And surprisingly enough, it’s a great way to get your kids working together.  Last year after opening the “architectural challenge” I watched my three kids construct a fairytale village in the lawn with wooden skewers, toothpicks and leaves for over three hours.  Their concentration and team work was amazing to see.IMG_0038

First of all I rummaged through my fabric scraps and sewed up some different sized pouches in which to put the activity items (measure all items and sew accordingly).  I just placed two identically sized pieces of material together (bad sides facing) and sewed three sides.  Nothing fancy!  After inserting the activity cards and items I simply sewed them all shut along a long piece of folded bias tape (you could also use ribbon or a long piece of fabric).

Here are the activities in this year’s garland:

The Photo Challenge: Last year the photo challenge was such a hit that I had to include another one this year.  They spent ages coming up with the perfect compositions for their photos last year and the little book we made with them is often hauled out and admired.  I just tucked a little card in the fabric pocket that instructs them to take photos that represent a list of 10 words (happy, summer, dance, self portrait and more that I can’t for the life of me remember now).

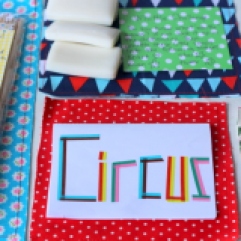
The Architectural Challenge: Another favourite from last year.  I included a few packages of long wooden kitchen skewers and toothpicks and some of that sticky gum-like stuff you use to hang photos on the wall (what is that called?!).  On the card I gave them instructions to construct a circus tent and come up with name and sign as well.  They use the lawn as their base because it’s easy to stick the skewers in for a stable construction.  I’ll also give them some small pieces of fabric to decorate.

Whittle Challenge:  This is a new one this year.  On the card I wrote asking them to look up the word whittle in the dictionary (because I’m pretty sure my multi-lingual kids have never heard that word).  Once they’ve figured it out they have to whittle (with small knife provided by me) shapes out of some small bars of soap (see there is a good reason to take those little hotel soaps home with you!).  I’ve included simple shapes to whittle such as heart, star, and flower.  I’ll let you know how it works out and if there are any major injuries.

Comic Book Challenge:  My kids are HUGE comic book fans (it’s a Dutch thing I guess).  So I made a tiny book with blank pages.  I divided each page into four boxes to accommadate their drawings and story.  They have to come up with a story with a circus theme and make their own comic book.  The ultimate work-together project.  Again, I’ll let you know if there are any injuries.

Cooking Challenge: My kids are really into cooking all of a sudden.  And since I really want to encourage and motivate them in the kitchen as much as I can I thought a cooking challenge would be perfect. So for this challenge I included a card which sends them on a search for a particular cookbook on our shelf and to a particular page.  They then have to prepare that recipe.  This year it’s a recipe for homemade pigs-in-blankets from the children’s cookbook Look and Cook by Tina Davis.

IMG_0080On top of it being fun for kids this garland is also really pretty to hang up!  When the kids are ready to open one of the pouches just cut open along the bottom (which makes it hardly noticeable that it has been opened).  You can then keep the garland for decoration or for re-filling with activities next summer.

We’ll be kicking off our garland activities in the coming days.  I’ll keep you posted on how they were all received by the little ones!

Festive Breakfast-In-Bed Table

18 Jun

We celebrated a wonderful Father’s Day this past week-end.  Usually Father’s Day in Italy is on March 19th but for some reason or another we’ve always celebrated it on the third Sunday of June like in Canada.  Seeing as the kids were all away last week on various school trips they hadn’t really managed to prepare anything special for their beloved Papa.  The panic started setting in on Friday evening so by the time I woke up on Saturday morning all three kids were standing by my bed ready (and stressed) to start crafting.IMG_9161

They decided they wanted to make a really special breakfast in bed.  They wanted to serve fresh fruits, poffertjes (miniature Dutch pancakes), freshly squeezed orange juice and they wanted it served in an extraordinary manner.  After some discussing and sketching we had come up with what we wanted to do and a list of things needed to be bought at the local diy.

IMG_9166The idea was to make a festive breakfast-in-bed table with some over the top decorations.  We bought a piece of wood, 4 wooden furniture legs, a long wooden rod (which we cut in half) and some screws.  For the whole afternoon we were busy sanding, sawing, drilling and painting before it was ready for the fun part.  Decorating.  We used Washi tape to decorate the edges of the table, some ribbon for bows and to wind up the poles and then we sewed our much loved tassels (bought in Morocco) to some pompom string.  The end result was exactly what the kids had in mind.  It may be a little kitsch (ok a lot) but it definitely  let’s the person being served breakfast-in-bed know (loud and clear )that they’re special and loved.  We even managed to only spill one full bottle of juice on our bed during the ceremonial breakfast.  That’s serious progress from last time.IMG_9204

And of course the little one of the family insisted on being served lunch in bed to get the full feel of the festive-breakfast-in-bed -table experience.

This will become standard practice for any special occasion, vip visitors or just when we feel a family member is in need of little extra attention and love.  We’ll be able to easily change the decorations for every occasion as well.  I’m thinking miniature garlands, pompoms, special placemats and napkins!  The options are endless.

Fabric Scrap IKEA Chair

11 Jun

A few weeks ago a good friend drove up my driveway and surprised me with two small chairs from IKEA (called Jules) that her big kids didn’t use anymore.  It’s funny because I was just recently looking for new chairs for my twin daughter’s room and the ones that she so generously dropped off to me were the ones that I had actually been looking at to buy.  Very serendipitous.
IMG_8822

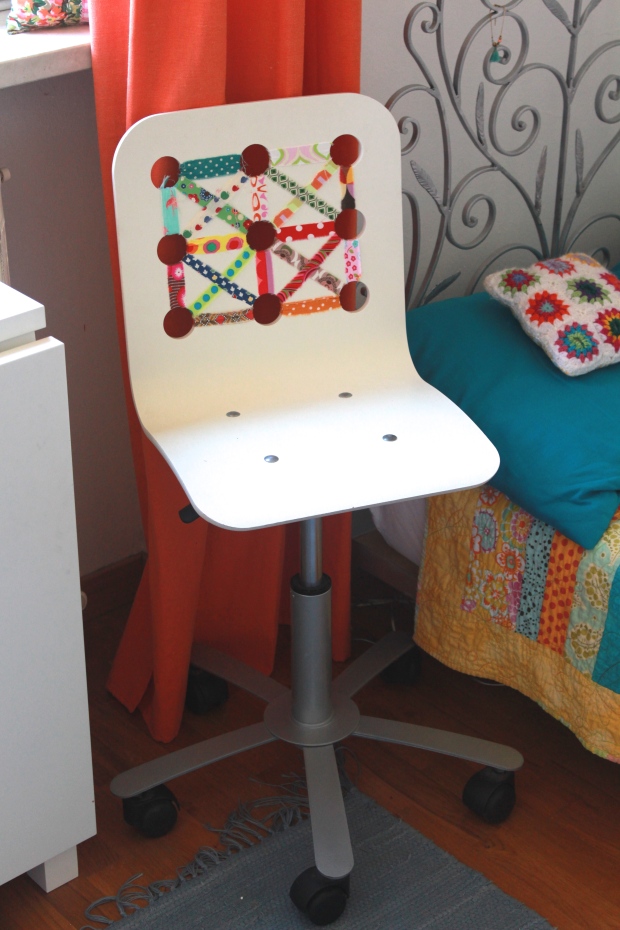
So there I was looking at these little white chairs in my kitchen and I just happened to have a small basket of material scraps next to me (which is often the case for me).  I had a few minutes to waste before making dinner so just started playing around with the scraps and the little holes in the back of the chair.  A few minutes later my daughter came in and started to help me.  We busily cut and wove and tied bows and ended up with the sweetest little chair for their bedroom.

IMG_8823The chair matches their very colourful room perfectly and the girls are so happy with their new “office chairs”.  Many hours are spent sitting at their desk sketching, writing pen-pal letters and doing homework.  IMG_8558Even the back is pretty with all the different coloured bows.  There are so many different ways you could decorate this chair with fabrics of every kind (patterned, solids, linens, cottons…).  1-IMG_6699

Above is another diy project I made with an everyday IKEA product.  These little fabric covered bulletin boards (made from kitchen cork boards) are great to hang up on walls and closets to display everything from the kid’s art to photos.  See post here.

Viva IKEA!

Strawberry Box

9 Apr

1-IMG_7227

Is it just me or does the out-of-control over-packaging of produce drive anyone else insane?  The other day I bought a few strawberries for my family and I’m pretty sure there was more wood than berries in the heavy-duty packaging.

I couldn’t bring myself to throw away the wooden trays so I put them on top of my fridge and thought that I’d find a use for them.

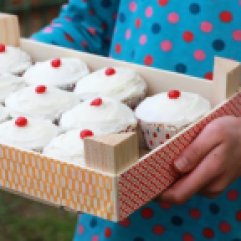
In the end I realised that they would make the perfect cupcake/muffin transporter.  I’m constantly baking cupcakes and muffins to take to friends and I’m always stuck on how to package them nicely so that they don’t get squished or fly off a plate while in the car.

I simply glued some nice paper (I used origami paper we bought in Japan last year) on the sides of the wooden crate.  That’s it.  I love the fact that this is a fast, simple and inexpensive way to re-cycle some unnecessary grocery store packaging.

You could use these for so many things.  Besides for muffins and cupcakes I’ll be using them this summer for when I give away fruits and vegetables from our garden (because I always end up planting enough to feed the entire neighbourhood).

Miniature Bulletin Boards

11 Mar


1-IMG_6699
The other day I had to do one of my bi-yearly trips to IKEA to pick up a lot of stuff I don’t actually need (besides tealights and napkins of course).  While there I came across 3-packs of round cork board heat-pads for the kitchen.  As soon as I saw them I knew I had to make miniature fabric covered bulletin boards for my daughter’s room.   They are turning 11 in a few weeks and I’m planning a surprise bedroom make-over and thought this would be perfect to decorate their walls with something useful.

So as soon as I got home I plugged in my hot glue gun (I’m so scared of that thing) and started cutting out circles in various fabrics.  I cut the circles out slightly larger than the heat-pads in order to be able to fold them over the back edge and attach with glue.  And yes, it is very dangerous for burning your fingertips.  I’m pretty sure I don’t have any fingerprints left.

1-IMG_6870In the end I made six boards using different materials.  When I have painted the girl’s room I will arrange them all above their desks for them to pin up various photos, letters and keepsakes (please no boyfriend photos for a while though!).  For the photos above I attached a few to the art corner cupboard in our living room.  I think I’ll be making many more of these in the coming weeks.

1-IMG_6860Now I just have to figure out the best way to hang them up.  For the cupboard I used 2 sided adhesive pads found in the local fai-da-te (DIY shop).  But for attaching them to walls I’ll need something a little sturdier.  And advice out there?

Valentine’s Round Up

13 Feb

Here I am writing from a little riad in Marrakech, Morocco.  We arrived here today after spending the last few days in a tiny village in the Atlas mountains.  It was an amazing time which included lots of walks in the mountains, a camel trek and some of the best food we’ve ever eaten.  And to top it all off we’ve had amazing weather since we arrived.  Yes, we are all ecstatically happy at the moment.

Even if the Moroccans don’t celebrate Valentine’s Day it’s been on my mind the last few days.  I have secretly stashed some home-baked heart-shaped chocolate-dipped cookies in our suitcase so that I’ll have something special for the family on the 14th.  I’m pretty sure Valentine’s Day this year will be one we’ll remember forever.

Here’s a little round-up of some of my favourite Valentine’s Day treats and surprises that you can make your loved ones.

1-IMG_5342

These little puffy sewn heart necklaces are the sweetest way to show your favourite little girl that she’s loved.  It’s an easy project that your kids can help you with.  Check out post and tutorial here.

free-valentine-day-card-printable

I love these Valentine’s Day cards over on Classic Play.  And you can download them for free!  Check out post here.

1-IMG_5438These Brown Sugar Shortbreads are the most delicious rich cookies and are perfect for Valentine’s Day due to the little jam heart centres.  Your house will smell divine while these are baking!  Get recipe here.

DIY Edible Confetti by The Proper Pinwheel

Edible confetti!  This is one of my favorite Valentine’s Day finds this year.  Easy to make and such a fun idea for a gift for classmates (or co-workers!).  Get full details and how-to on The Proper Pinwheel.

We made these little candy bags for the twin’s classmates last year and they were a hit.  All you need are some clear plastic bags, pink and red construction paper, some colourful candy and a stapler.  Check out what we made my son’s class and the teachers here.

Valentines-Competition-La-tete-dans-les-idees

I absolutely adore this cupid’s arrow diy that is over on La Tete Dans Les Idees.

Enjoy your Valentine’s Day and make sure to tell the ones you love how much they mean to you!

The Sad Little Chair

25 Sep

Last week I popped by my favorite local Mercatino Usato (2nd hand shop) because I was on the hunt for some vintage fabrics.  While there I came across this very old, sturdy and sad looking child’s chair.

Obviously I didn’t need the chair because all of my kids are big and lanky and tall.  But for 3 euro I just had to take it home with me.

First I gave it a few coats of primer (because I hate to sand).  Then I gave it a coat of a nice white high gloss paint.

And then I started washi-ing it.  I couldn’t stop.

Like the old Japanese proverb says “Washi makes everything more beautiful”.  It’s a very old saying.

After I had finished taping it I sprayed it with an acrylic paint varnish.  That way the tape is on there sicurely and won’t peel off.
I might have gone a little overboard but the chair is definitely not sad anymore.  And now I must go clean those windows in the picture.